How to Configure Data Retention Setting
Navigate the complexities of data storage with our guide on configuring Data Retention Settings in Google Analytics. Take control of how long your user and event data are stored.
1
Log into Google Analytics
Access the Google Analytics website and sign in with your account credentials.
2
Navigate to the Admin Section
Once you are inside the dashboard, click on the "Admin" tab at the bottom left corner, represented by a gear icon.
3
Choose the Correct Property and Account
Make sure you are in the correct account and select the property for which you want to configure Data Retention settings.
4
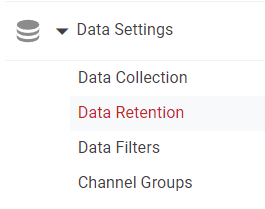
Locate Tracking Info (Universal Analytics) or Data Settings (GA4)
For Universal Analytics: Under the "Property" column, find “Tracking Info” and click on it. Then click on "Data Retention."
For GA4: You would go to the "Data Setting" menu under the Property column.
5
Configure Data Retention Settings
For Universal Analytics: You will see options for "User Data Retention" and "Reset on New Activity". Choose the retention period for how long Analytics will keep user-level and event-level data. You can also toggle "Reset on New Activity" to ON or OFF.
For GA4: In GA4, you will usually find options to modify event data retention periods.
6
Save Changes
After you've made your selections, remember to save your changes.
7
Review and Update Periodically
It’s a good practice to review your data retention settings periodically to ensure they align with your data management and compliance needs.
You've now mastered the ins and outs of setting up Data Retention in Google Analytics. As data governance becomes increasingly critical, this knowledge will empower you to stay compliant and make informed decisions. Don't forget to periodically review and update your settings to align with any legal changes or business needs


