How to Set Up and Customize Salesforce Opportunity Tracking
Welcome to our comprehensive guide on setting up and customizing opportunity tracking in Salesforce. Effectively managing opportunities is critical for any sales organization, and Salesforce provides robust tools to streamline this process. In this guide, we'll walk you through the steps to set up opportunity tracking, create customized opportunity stages, and configure sales processes that align with your unique business needs. By optimizing your opportunity tracking in Salesforce, you'll gain valuable insights into your sales pipeline, enhance collaboration among your sales team, and ultimately boost your sales performance. Let's dive in and unlock the full potential of Salesforce's opportunity tracking features.
1
Navigate to the Opportunity object
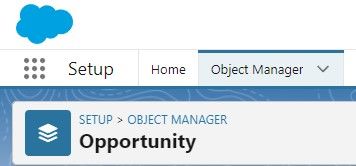
First, open a test opportunity in your Salesforce org. From here, you have two options to access the Opportunity object settings: click "Setup" in the upper right corner, or click "Edit Object" for a quicker route.
2
Find the "Stage" field
Once you're in the Opportunity object settings, click on "Fields & Relationships" and use the Quick Find search box to search for "Stage". Click on the "Stage" field to access its settings.
3
Customize the Stage.
The "Stage" field is a picklist, meaning it has a set of predefined values. To add a new stage, click "New" under the Picklist Values section. In this example, we will create a "Demo" stage with a 35% probability, set as "Open", and assign it to the "Pipeline" forecast category. Add an optional description if desired. Click on “Edit” to edit existing stages. Change the Probability, Description, Forecast Category, Assign color to each stage. Click on “Save”.
4
Reorder the stages
After saving the new stage, you may notice that it appears at the bottom of the list. To reorder the stages, click "Reorder" in the Picklist Values section. Click on the new "Demo" stage and use the arrows to move it between the "Needs Analysis" and "Value Proposition" stages. Click "Save" to confirm the new order.
5
Verify the new stage on the Opportunity
Return to your test opportunity and refresh the page. You should now see the new "Demo" stage between the "Needs Analysis" and "Value Proposition" stages in the Stage picklist.
Congratulations on successfully setting up and customizing opportunity tracking in Salesforce! You've now equipped your sales team with a powerful toolset to efficiently manage opportunities, track progress, and close deals. Regularly review and update your opportunity stages and sales processes to adapt to changing market dynamics and business requirements. Encourage your team to leverage the insights provided by Salesforce to make data-driven decisions and continually improve their sales strategies. With Salesforce's opportunity tracking capabilities at your disposal, you're well-positioned to achieve greater sales success and drive your business towards growth and prosperity. Thank you for joining us on this journey, and may your Salesforce implementation continue to drive exceptional results for your organization.


