How to Integrate Drop-down Menus and Sliders
Drop-down menus and sliders are interactive elements that can be used to filter data, create calculated fields, and trigger dashboard actions in Tableau. They can be used to make dashboards more user-friendly and interactive.
1
Open Tableau and Select Your Project
Launch Tableau Desktop and open the project where you want to integrate drop-down menus and sliders.
2
Go to the Worksheet
Click on the worksheet where you want to implement the drop-down menu or slider.
3
Identify the Field for the Drop-Down Menu
Select the field from the data pane that you want to use for the drop-down menu.
4
Drag Field to Filters Shelf
Drag the selected field to the Filters shelf.
5
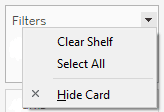
Show Filter
Right-click on the field in the Filters shelf and choose ‘Show Filter’.
6
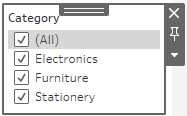
Customize as Drop-Down Menu
In the filter that appears, click on the drop-down arrow and select the 'Drop-down' option.
7
Add Slider
If you also want to add a slider, choose a numerical or date field, drag it to the Filters shelf and follow the same steps to ‘Show Filter’.
8
Customize as Slider
Click the drop-down arrow in the new filter and choose the 'Slider' option.
9
Move to Dashboard
Drag the worksheet containing your drop-down and slider into the dashboard.
10
Position the Drop-Down and Slider
In the dashboard, position the drop-down and slider where you want them to appear.
By integrating drop-down menus and sliders into your dashboards, you can create more engaging and informative experiences that can help users to explore data more easily and make better decisions.


