How to Set Up Custom Themes for a Branded Look
Welcome to our comprehensive guide on setting up custom themes for a branded look on Help Scout. A branded appearance enhances your customer support's professionalism. In this guide, we'll walk you through the steps to create custom themes that align with your brand's aesthetics.
1
Sign in to Help Scout

Navigate to the Help Scout website and sign in to your account. You'll then be taken to your dashboard.
2
Access 'Docs'
From the top of your dashboard, select the 'Manage' option then select the 'Docs' tab. You'll be redirected to a new page where you can manage your Docs sites.
3
Select Your Docs Site
Choose the Docs site you want to customize by clicking on it. This will lead you to the settings page for the chosen site.
4
Proceed to 'Site Settings'

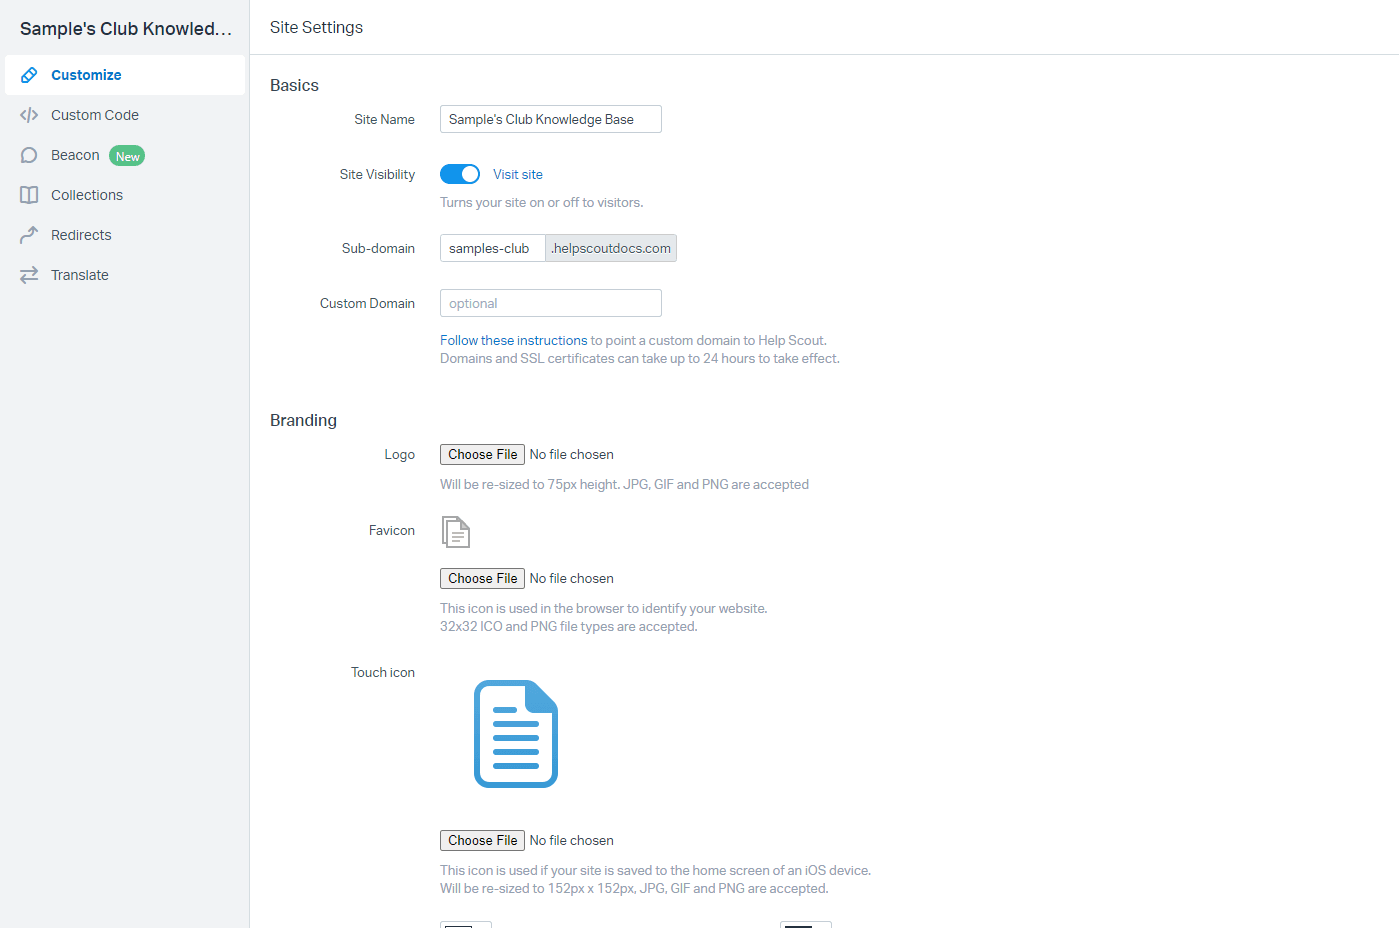
Upon selecting the chosen Doc site tab, you will be immediately directed to the 'Site Settings'. This area houses the customization options for your selected Docs site.
5
Customize Theme
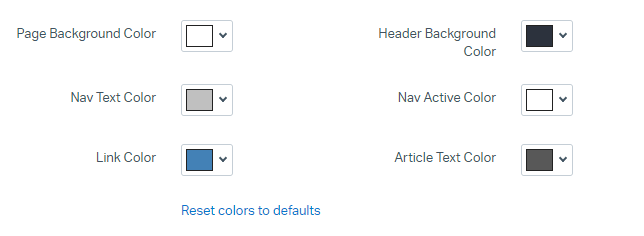
On the 'Customize' page, you have options to set a custom color theme for your Docs site. Choose your desired colors for the header, links, and button. You can also set a background color.
6
Save Changes
Once you've customized your theme, click on the 'Save' button at the bottom of the 'Appearance' page to apply your changes.
Congratulations! You've successfully learned how to set up custom themes for a branded look on Help Scout. By personalizing your themes, you can create a cohesive brand experience, improve user engagement, and reinforce your brand identity. Continuously update and refine your themes to keep your customer support's appearance fresh and on-brand. Happy branding!


