How to Set Up and Customize Pipedrive's Activity Types
Learn to set up and personalize Pipedrive's Activity Types for efficient task management and improved workflow
1
Accessing Activity Types
1
Log in to your Pipedrive account
2
Navigate to "Company Settings"
2
Managing Activity Types
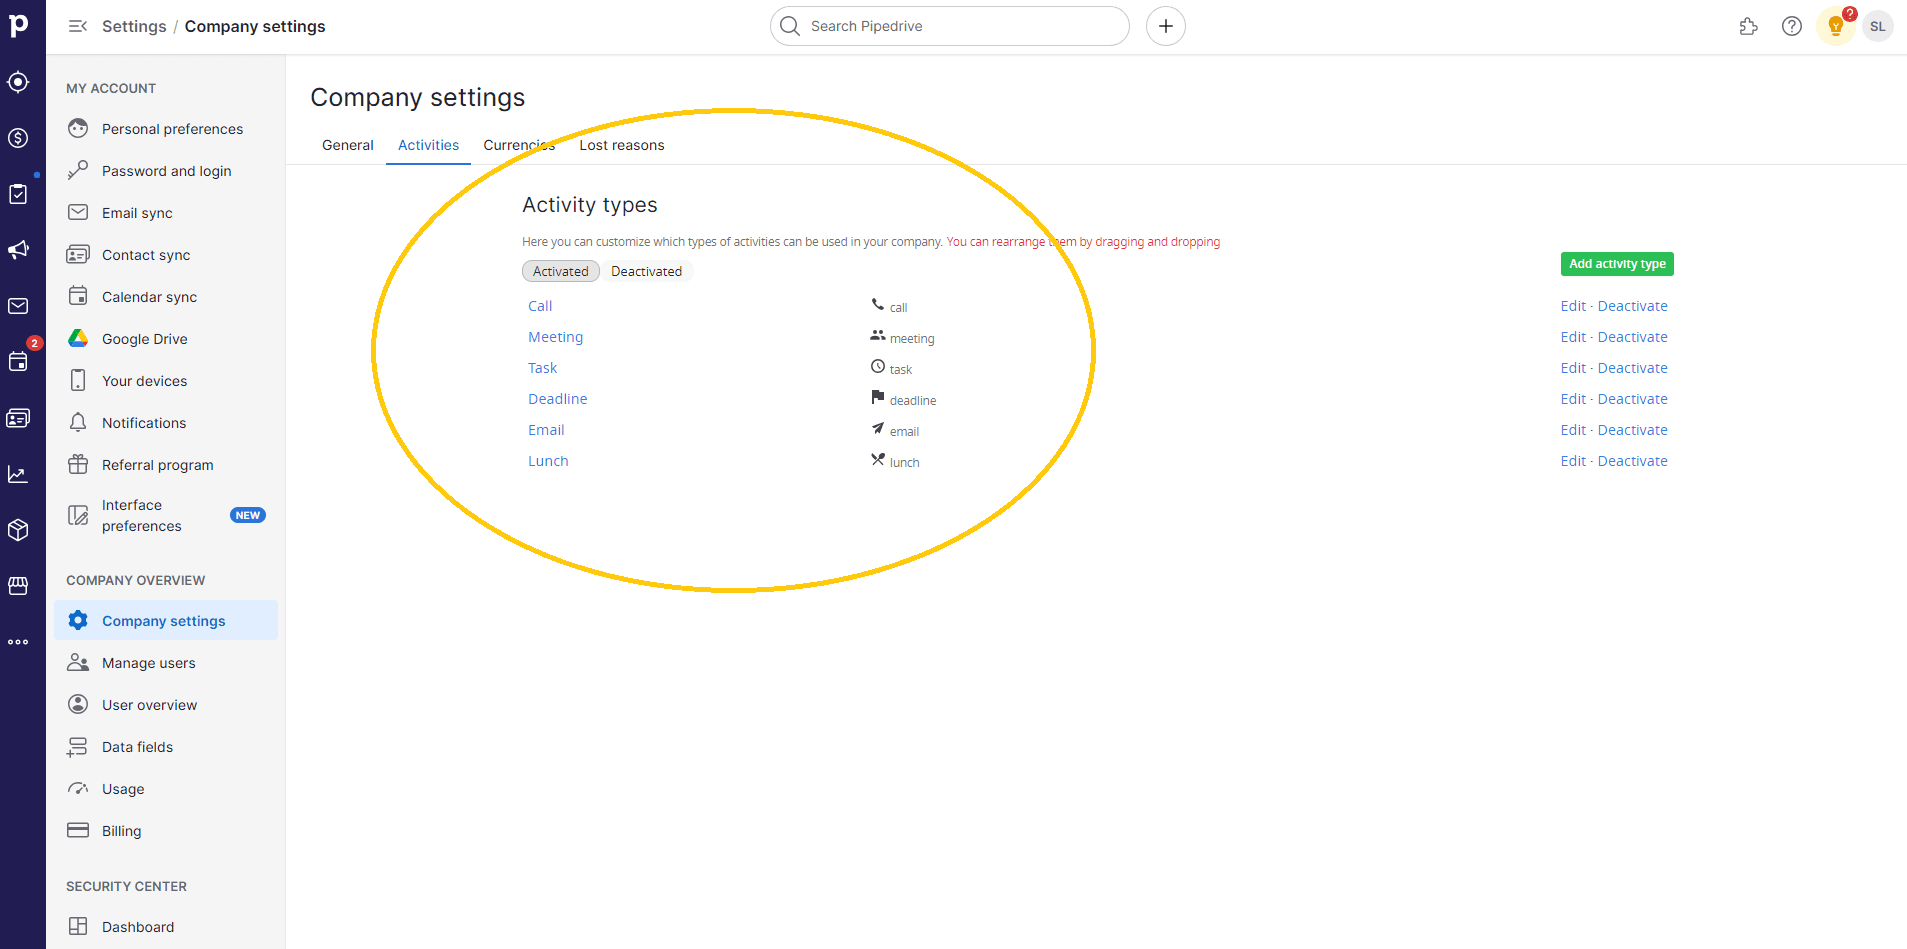
Find and click on the "Activity Types" option. This is where you can manage, create, and customize your activity types.
3
Viewing Default Activity Types

Pipedrive comes with default activity types like "Call," "Meeting," and "Task." You can see these default activity types in this section.
4
Adding a New Activity Type
Click on the "Add a new activity type" button. A dialog box will appear where you can set up your new activity type.
5
Customizing Activity Type Details
1
Enter a name for your new activity type (e.g., "Demo").
2
Choose an icon to represent the activity type visually
6
Editing and Deactivating Activity Types
1
To edit an existing activity type, click “Edit”
2
Make changes to the activity type name, icon and other details
3
If a particular activity is no longer relevant, you have the option to deactivate it. You can also choose to activate the activities listed under the "deactivated" column
7
Reordering Activity Types
1
Hover over an activity type you want to reorder
2
Click and drag the activity type to move it up or down in the list
8
Using Customized Activity Types
When adding a task, call, or meeting to a deal or contact, you can now choose your customized activity type. The selected icon will help you easily identify the type of interaction.
9
Enhancing Workflow Efficiency
1
By customizing activity types, you can align Pipedrive with your unique workflow
2
Easily differentiate between different types of interactions at a glance
Tailoring your Pipedrive Activity Types empowers your team, enhancing organization and boosting productivity. Get started today


