How to set up and configure Salesfore Service Cloud
Streamline your customer service: Learn how to set up and configure Salesforce Service Cloud efficiently for enhanced support and satisfaction.
1
Log in to Salesforce
Visit Salesforce's website and log in with your credentials.
2
Access the Service Setup Page
Once logged in, click on the Cog icon located at the top right corner. Choose "Service Setup" from the dropdown menu.
3
Use the Service Setup Assistant
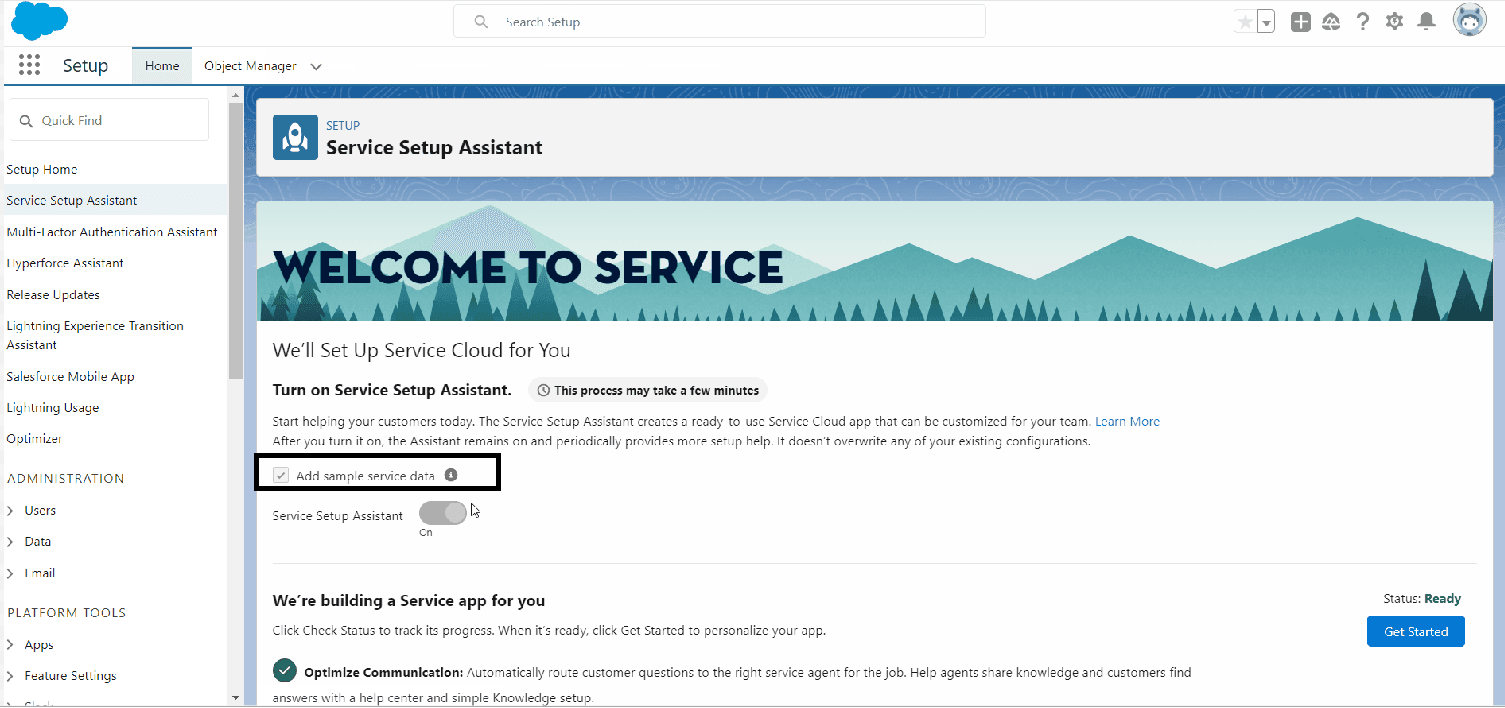
On the Service Setup page, click on the "Service Setup Assistant". You will be redirected to an intro page that explains what the Assistant does. Click "Continue" or "Get Started".
4
Enable Service Data

Enable the service data option. This will populate the dummy data in background, which can be useful for testing.
5
Setup Support Email
Enter your support email. This is the email that you use to manage your cases. Salesforce will create a specific email address for your inbox.
6
Add Users
If you have any users to add, input their details. Click "Complete" when done.
7
Setup Email Forwarding
Setup a forwarding rule so that all emails received by your support inbox are forwarded to the Salesforce-specific email address. You will need to verify this by copying a code from a case created in Salesforce and pasting it in the verification field. Save your changes.
8
Test the Email to Case Functionality
Send a test email to your support inbox and check if it appears as a case in Salesforce.
9
Check Dummy Data
Check the dummy data created by the Service Setup Assistant to ensure everything is functioning as expected.
Empower your customer service team and elevate customer satisfaction by mastering Salesforce Service Cloud setup and configuration. Start delivering exceptional support experiences today!


