How to Set Up Custom Fields for Efficiency
Welcome to our guide on setting up custom fields for efficiency on Help Scout. Custom fields allow you to collect and organize specific data, streamlining your support process. In this guide, we'll show you how to configure custom fields to boost productivity and provide personalized customer experiences.
1
Navigate to Custom Fields
After logging in to Help Scout, locate the settings icon on the left-hand side of the screen and click on it. From the options that appear, select 'Custom Fields'.
2
Create a New Custom Field
Click on 'New Custom Field' in the center corner of the screen.
3
Choose a Field Type

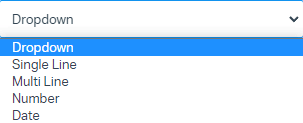
You'll be presented with several field types such as Dropdown List, Single Line, Multi Line, Number, and Date. Select the one that best suits your needs.
4
Configure the Custom Field
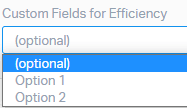
Enter a name for your custom field in the 'Field Label' section. If you chose 'Dropdown List', you need to specify the options for the dropdown.
5
Save Your Custom Field
After finalizing the details, click the 'Save Field' button.
6
Use Custom Fields in Conversations
Custom fields will appear on the right sidebar in each conversation. Use them to categorize, filter, or track specific information about your customer interactions.
Congratulations! You've successfully set up custom fields for efficiency on Help Scout. By leveraging tailored data collection, you can optimize your support process, improve ticket management, and better understand your customers' needs. Continuously adapt and refine your custom fields to stay proactive and deliver exceptional service. Happy customizing!


